Strategies for avoiding amplicon contamination in the molecular laboratory
The high sensitivity of the polymerase chain reaction (PCR)—theoretically with lower limits of detection as little as a single template molecule; practically, 10 to 100 copies for many assays as run—is one of its greatest strengths, but also its greatest weakness. As the method works through creating copies of its target, any positive sample can lead to large numbers of molecules which can in turn contaminate subsequent reactions and cause false positive results.
To get a sense of the scope of this, consider a successful “average” 25μl PCR somehow getting opened and spilled in the lab. This would contain on the order of 10^12 template copies (amplicons); in other words, if a thorough cleaning reduced this by a million fold, you’d still have a million amplicon copies “floating around,” each of which could contaminate a reaction. If you’re fortunate enough to have never experienced this first-hand, you can thank the widespread acceptance of real-time PCR methods, which do away with having to open reaction tubes post amplification, and perhaps gain an appreciation of why anyone who has been through the experience treats the risk as real and ever-present.
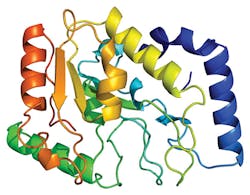
Even real-time reaction tubes or plates can accidentally break open or get unsealed, so in many labs a second line of defense against amplicon contamination is used—Uracil-N-glycosylase, or UNG. Basically, this works by incorporating a small amount of UTP in the PCR master mixes alongside TTP and the other three usual nucleoside triphosphates. During amplification, a small number of these UTP substitute in for TTP, resulting in all amplicons having at least a few uradine nucleotides incorporated. To ensure that these cannot serve as template in a subsequent reaction, the (thermolabile) enzyme UNG can be added to all reactions, and a first step of the PCR thermocycle can be a brief incubation at around 37oC. At this temperature, the UNG finds and cuts out any uradines found. Since these should only occur in amplicon and not natural template, and the removal of the offending base blocks the contaminating molecule from acting as a successful PCR template, an “active decontamination” of the reaction has occurred as its first step. The following high temperature steps in the reaction deactivate the UNG so it doesn’t attack any newly formed amplicons.
Overall, the process is elegant and effective, but it’s not the only possible approach to the issue of preventing amplicon contamination. In this month’s installment of The Primer, we’ll quickly review what some of the other complementary tools and strategies to avoid amplicon contamination are, and how they work.
Layout and process flow
If it’s possible within the physical constraints of the molecular diagnostics laboratory, it’s extremely helpful to have dedicated rooms for master mix preparation, sample extraction, PCR reaction setup, and final amplification and any handling of amplicon. Supported by ancillary practices such as dedicated garb for the various spaces, unidirectional material flow (toward the amplification area, not away), and, ideally, air pressure gradients with lowest pressure in the amplification area, that can aid in insuring that when a reaction vessel leaks in the amplification space, the products aren’t readily introduced back into newly incoming samples, reagents, or reaction mixtures. While this may seem to be just common sense, not all laboratories (particularly, older ones not originally designed for molecular workflows) have the luxury of having this sort of layout. Where this level of compartmentalization isn’t feasible, the next best approach is perhaps the use of dedicated biosafety cabinets (BSCs) or even their smaller, benchtop PCR setup hood cousins as the individual subspaces.
Other measures that can assist in physical isolation include use of “sticky mats” on the floor at doorways between process regions, and expanded personal protective equipment (PPE) such as disposable single use hairnets, masks, and shoe covers. On the equipment side, physical anti-contamination barriers can include the use of plugged, aerosol-resistant tips for micropipettors (in this author’s opinion, best coupled with having micropipettors dedicated for use in each of the rooms/ processes discussed above).
Chemical and UV decontamination
The next line of defense against amplicon contamination is the cleaning of surfaces and instruments prior to (and after) use. It’s important to remember what we’re trying to clean up here—DNA—because some of the common cleaning and sterilization processes in the lab are effective at inactivating viable microbes but do little or nothing to render DNA non-amplifiable. Yes, I’m looking at you, autoclave—and your sidekick, 70 percent ethanol. For wiping down work surfaces, rather than the 70 percent EtOH, use household bleach. The hypochlorite anion (to use bleach’s formal name) attacks DNA strands, causing oxidative damage leading to strand breaks and probably other types of damage, such as creation of base adducts like 5-chlorocytidine which don’t effectively serve as a template for replication.
While the mechanism of action of bleach in rendering DNA non-amplifiable is likely multifactorial and a matter of debate in extant literature, some aspects of its action are well known. It’s generally effective at around a 1:10 dilution of consumer strength domestic bleach (which can vary by manufacturer, usually five percent to eight percent) in water; so the actual on-the-bench strength for efficacy is about 0.5 percent. Keep in mind that dilute bleach solutions decay, however, and should be regularly remade. How often will probably depend on how long you’re willing to let it sit on the treated surfaces before assuming they’re clean (more on that below), and what your risk tolerance is, but in general solutions should be freshly made anywhere from daily to weekly. Any older than that, and using it is probably mostly placebo effect. As for “how long,” its action is not instantaneous, so ideally surfaces should be allowed to sit for several minutes after treatment and before use; anything from five to 30 minutes is suggested in literature.
Dilute bleach is corrosive by nature, however, and not all work surfaces and instruments are amenable to being treated with it. Another DNA-destroying liquid comes in the form of 1.0N HCl (dilute hydrochloric acid). It can act by causing acid catalyzed depurination, randomly removing A and G bases from DNA and leaving “gaps” or chain breaks which can’t be amplified across. Dilute HCl is stable, so it doesn’t need to be made fresh all the time, and many materials which don’t take kindly to being bleached are unfazed by exposure to HCl at this strength. So why don’t we just use this all over the lab and forget about bleach? The answer is that the HCl is not nearly as effective. Longer exposure times are required, and if a surface is contaminated enough, some DNA may survive intact; one study showed that even with 2N HCl and five minutes exposure, some amplifiable copies of a 600 base pair test target were recoverable.1 For what are potentially lightly contaminated surfaces and where bleach is for some reason unacceptable, it does remain an option particularly if longer exposure, such as overnight soaking, can be contemplated.
UV light is another standard method in the MDx lab. It can render DNA non-amplifiable through the formation of cyclobutane pyrimidine dimers and, to a lesser extent, what’s known as the “6-4 photoproduct”; in either case, it’s the creation of covalent bonds between adjacent bases on a DNA strand that disrupts their ability to hydrogen-bond as needed to serve as a replication template. Sometimes entire rooms will be rigged with UV light sources, in which case safety precautions are essential to ensure that these can’t be on while people are inside, and sometimes they’re set up inside BSCs or PCR hoods. In each of these cases, it’s worth keeping in mind that they’re only effective where the light can reach; anything shadowed, or under a layer of protective grime, is unaffected.
Many things, including most plastics, don’t stand up well to prolonged strong UV exposure, becoming brittle and crumbly over time; this also applies to micropipettor shafts. In addition, the UV light sources decrease output over time and become less effective. Thus, even if those things spread out in your hood are not shadowed, and you’re OK with everything around them being bathed in a destructive UV glow, if that UV light source is of unknown age and hasn’t been tested, it may be little more than a spooky purple glow lulling you into a false sense of security.
In-reaction chemistries
Finally, we come back to things you can add into the reaction vessel—microtube, reaction plate, capillary, or whatever fits your PCR instrumentation. The most common approach here by far is the UNG method, but it’s not the only possible approach. Psoralen and isopsoralens are a class of molecules which can be added to a PCR reaction during setup, and which at suitably low concentrations—roughly, below 100mg/ml—don’t noticeably inhibit the PCR reaction. At the end of the reaction, and prior to opening any reaction tubes, exposure of the translucent reaction vessels to light causes the (iso)psoralen molecules to cross-link to any DNA present, including amplicon. If this crosslinked amplicon somehow escapes into the lab, the crosslinks block its capacity to act as an amplification template.
Aside from the fact that this requires an inconvenient UV light exposure for all reactions post-amplification, another disadvantage of this approach is that the inactivating chemistry doesn’t occur until after the amplification reaction. In other words, if somehow a reaction breaks or otherwise gets open after a successful amplification but before inactivation, you’re contaminated. (By contrast, as the UNG approach incorporates the uridines during each cycle of replication, breakage or leakage from a reaction at any point is not worrisome).
Common sense: putting these all together
The best defense against PCR contamination in your laboratory will be some combination of these approaches, as fits your lab’s physical layout, methods in use, resources, and requirements. What that particular combination is, is something readers may hopefully be better able to assess in their own context through a basic understanding of the approaches’ mechanisms of action, strengths, and weaknesses. A robust set of anti-contamination measures, coupled to ubiquitous negative control reactions (and possibly, as needed, scheduled environmental wipe/sample reactions) to detect any breakdowns in these defenses, can help protect your lab from the scourge of PCR contamination.
REFERENCE
- Prince AM, Andrus L. PCR: how to kill unwanted DNA. Biotechniques. 1992;12(3):358-360.
John Brunstein, PhD, is a member of the MLO Editorial Advisory Board. He serves as President and Chief Science Officer for British Columbia-based PathoID, Inc., which provides consulting for development and validation of molecular assays.
About the Author

John Brunstein, PhD
is a member of the MLO Editorial Advisory Board. He serves as President and Chief Science Officer for British Columbia-based PathoID, Inc., which provides consulting for development and validation of molecular assays.

